Getting Started
BRYX Overview
Welcome to BRYX, your convenient, secure, and scalable models-as-a-service platform, offering a range of models that help you streamline your operations, optimize your decision-making processes, promote safety, and reduce your overall costs. Taking advantage of BRYX's power and speed, you can easily and quickly upload and manage data, run models, monitor model runs, and view/download model results---all from a single location.
Key components of the BRYX platform include:
- Catalog: Our catalog lists all models (currently available and coming soon). You can read a brief description of the model, learn more about its use case, required inputs, and outputs.
- Run Model Wizard: You can select a dataset for the model, enter any necessary parameters, and start the model run.
- Datasets: The Datasets area allows you to create and store a new dataset for model runs.
- Results: The Results area provides you with a list of all model results along with the model run's status. You can select a specific model run to view more information, or choose to download the model results.
Using BRYX
To get started with BRYX, you should do the following:
- Upload Your Data
- Start Your Model Run
- View Your Results
Data Management
Upload Data
BRYX provides you with data management features that allow you to easily upload and store data for your model runs. To upload the dataset(s) that you would like to use, do the following:
- Select Datasets from the left-hand menu.
- Select the Add Data button. The following wizard
appears:
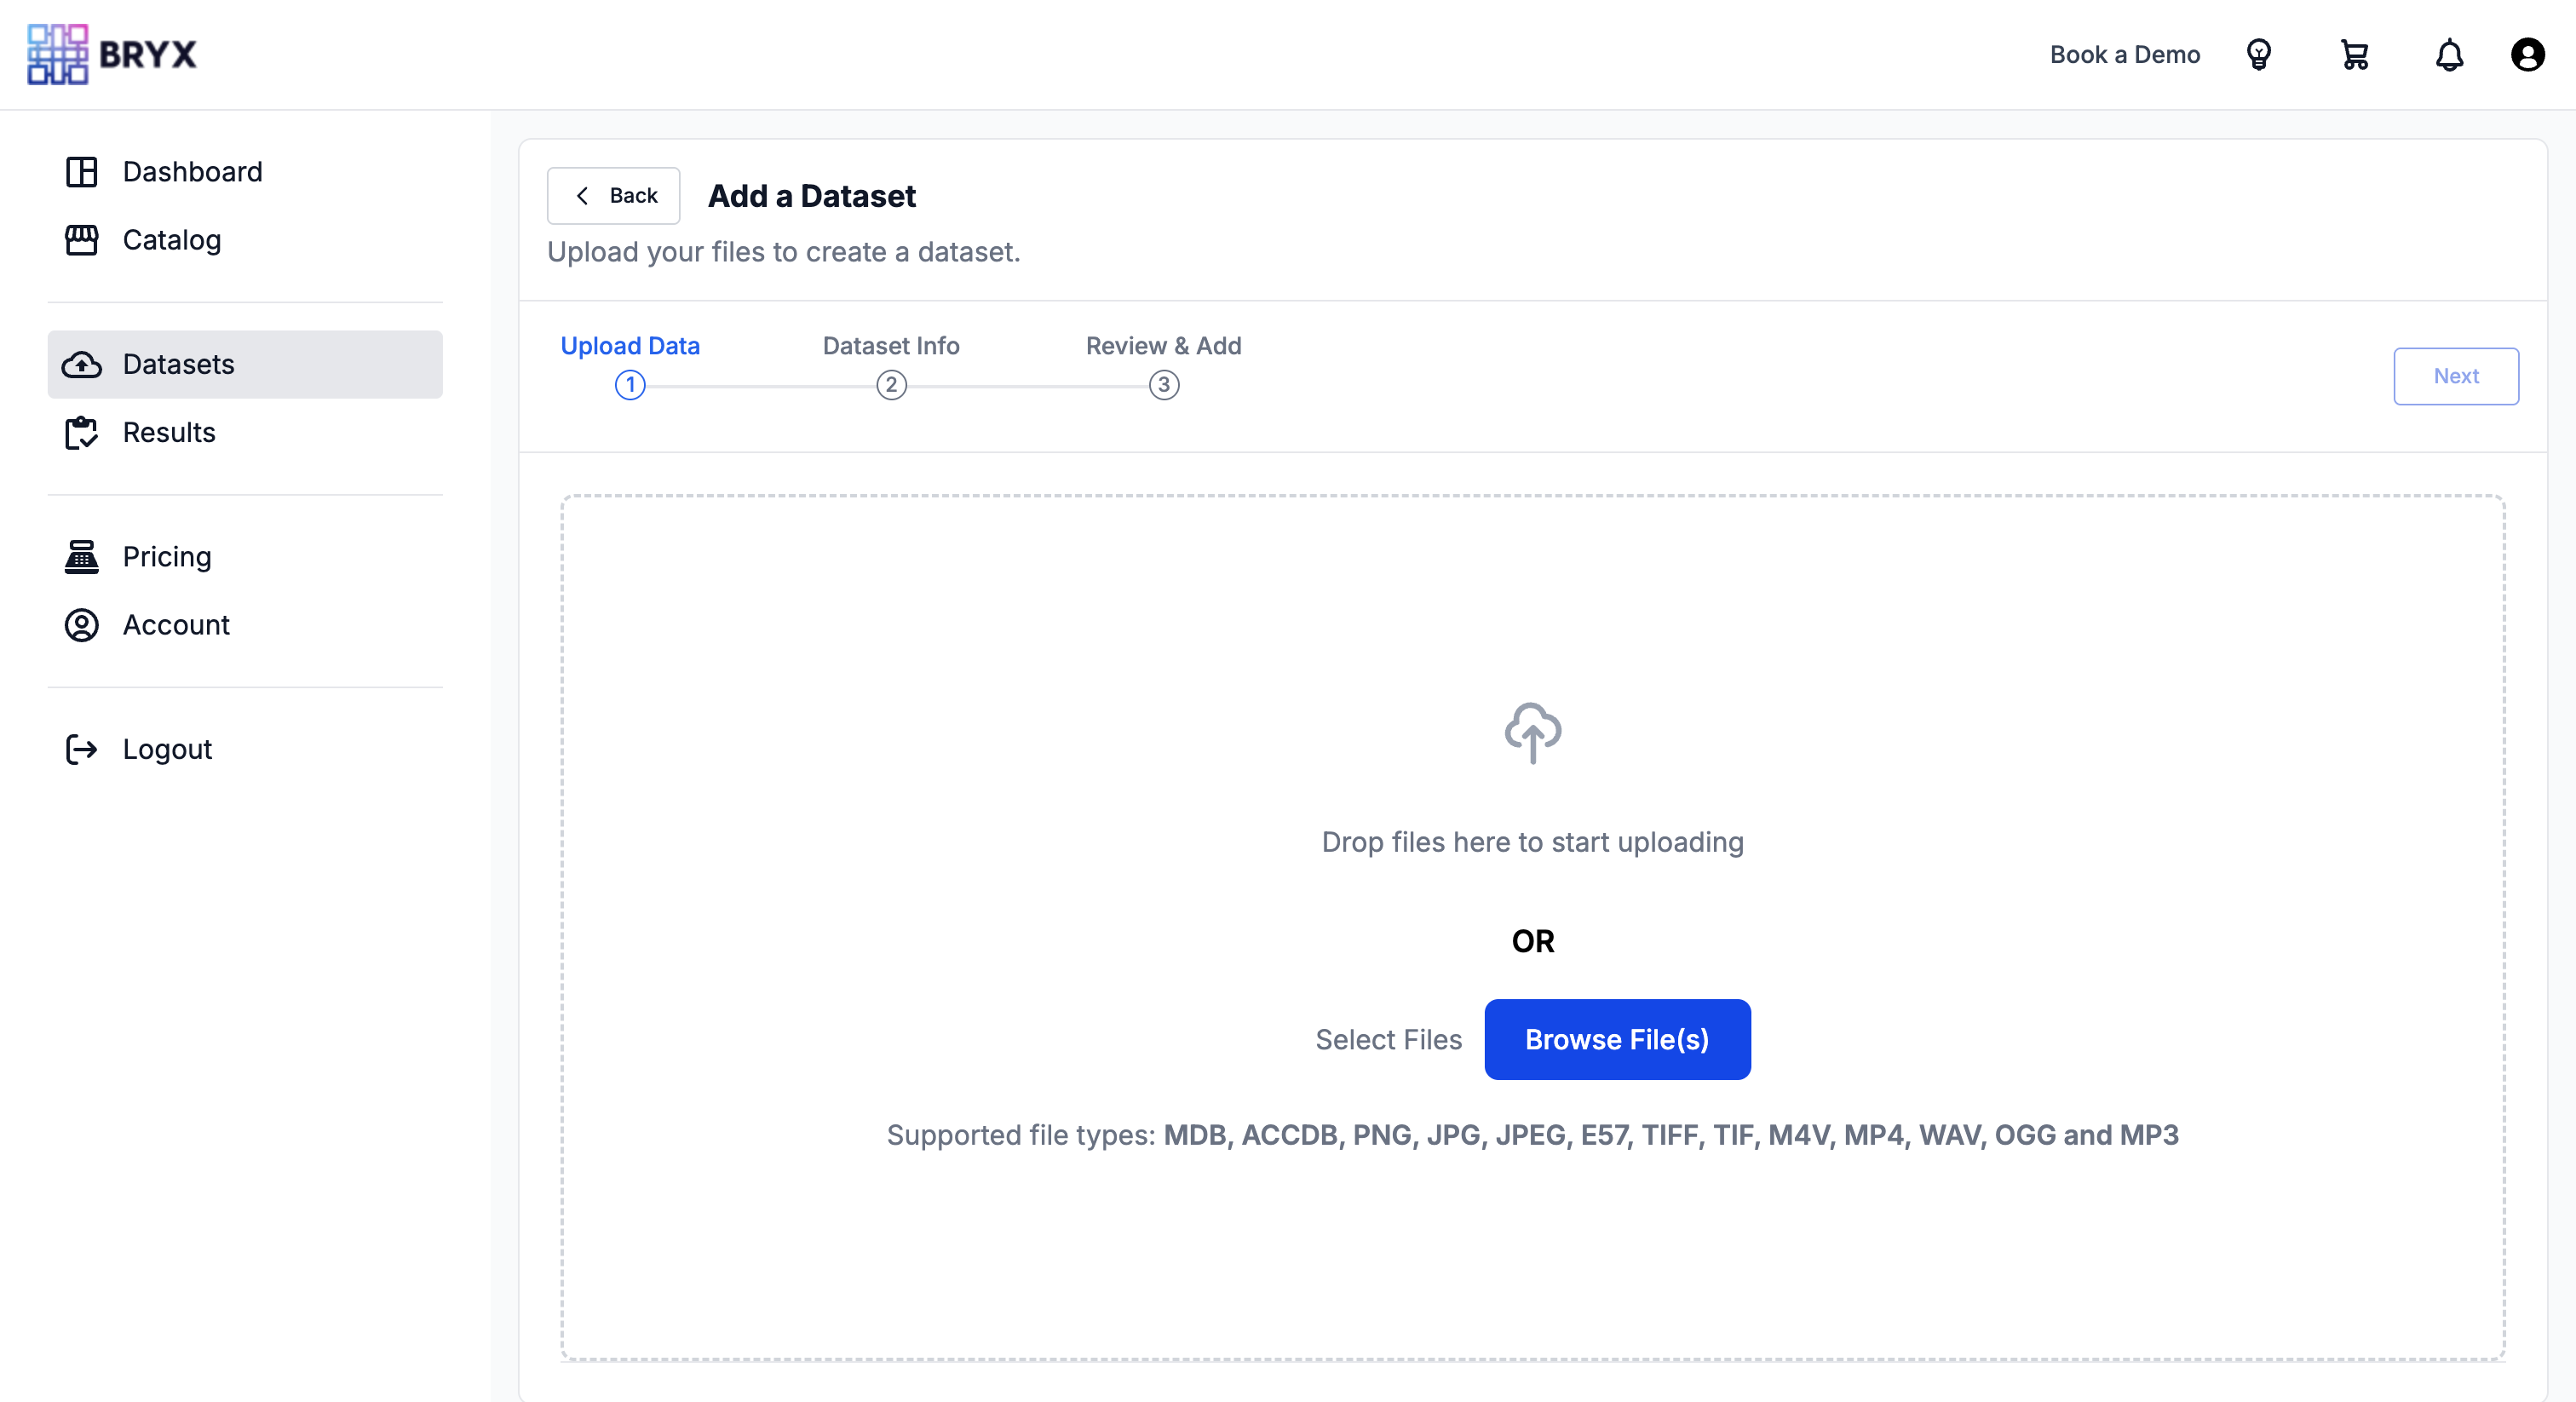
- Upload Data Step:
- Select the files to upload or drag / drop the files into the box provided. At this point, your file(s) will be listed.
- Click on the x icon next to the file to remove it from your dataset.
- If you want to continue adding files to your dataset, select Add More Files.
- Select the Next button when ready.
- Dataset Info Step:
- Enter a friendly name for your dataset in the Dataset Name field. This field is required.
- Enter a description of the data in the Description field.
- If you do not want your data to be used for retraining the model, enable the Opt out of use for retraining option.
- Select the Next button when ready.
- Review & Add Step:
- Review the files that you have added to the dataset.
- Select the Add button when ready.
- Create Dataset Step:
- BRYX scans your dataset for malware; all files that have passed the malware scan can be added to your dataset.
- Select the Continue button to create the dataset.

Delete Datasets
To delete existing datasets from your account, do the following:
- Select Datasets from the left-hand menu.
- Select the trash icon next to the dataset that you are no longer interested in.
Run Models
BRYX provides a Run Model wizard that steps you through the process of running a model. Do the following:
- Select the Run Model button on the appropriate model card in the Catalog.
- Select Dataset Step:
- Choose the dataset that you’d like to use for the model.
- If you haven't uploaded any data yet, select Add Dataset.
- Select the Next button when ready.
- Data Validation Step:
- BRYX will check to make sure the selected data is appropriate for the model that you are running.
- Select the Next button when ready.
- Enter Parameters Step:
- Enter a name for your run in the Model Run Name field. The name that you specify will be used to identify the results for the model run.
- Specify/select the appropriate parameters for your model run.
- Select the Next button when ready.
- Review & Run Step:
- Review the details of your model run.
- Select the Run Model button when ready.


View Model Results
Once your model run is complete, you can view and download your results. Do the following:
- Select Results from the left-hand menu.
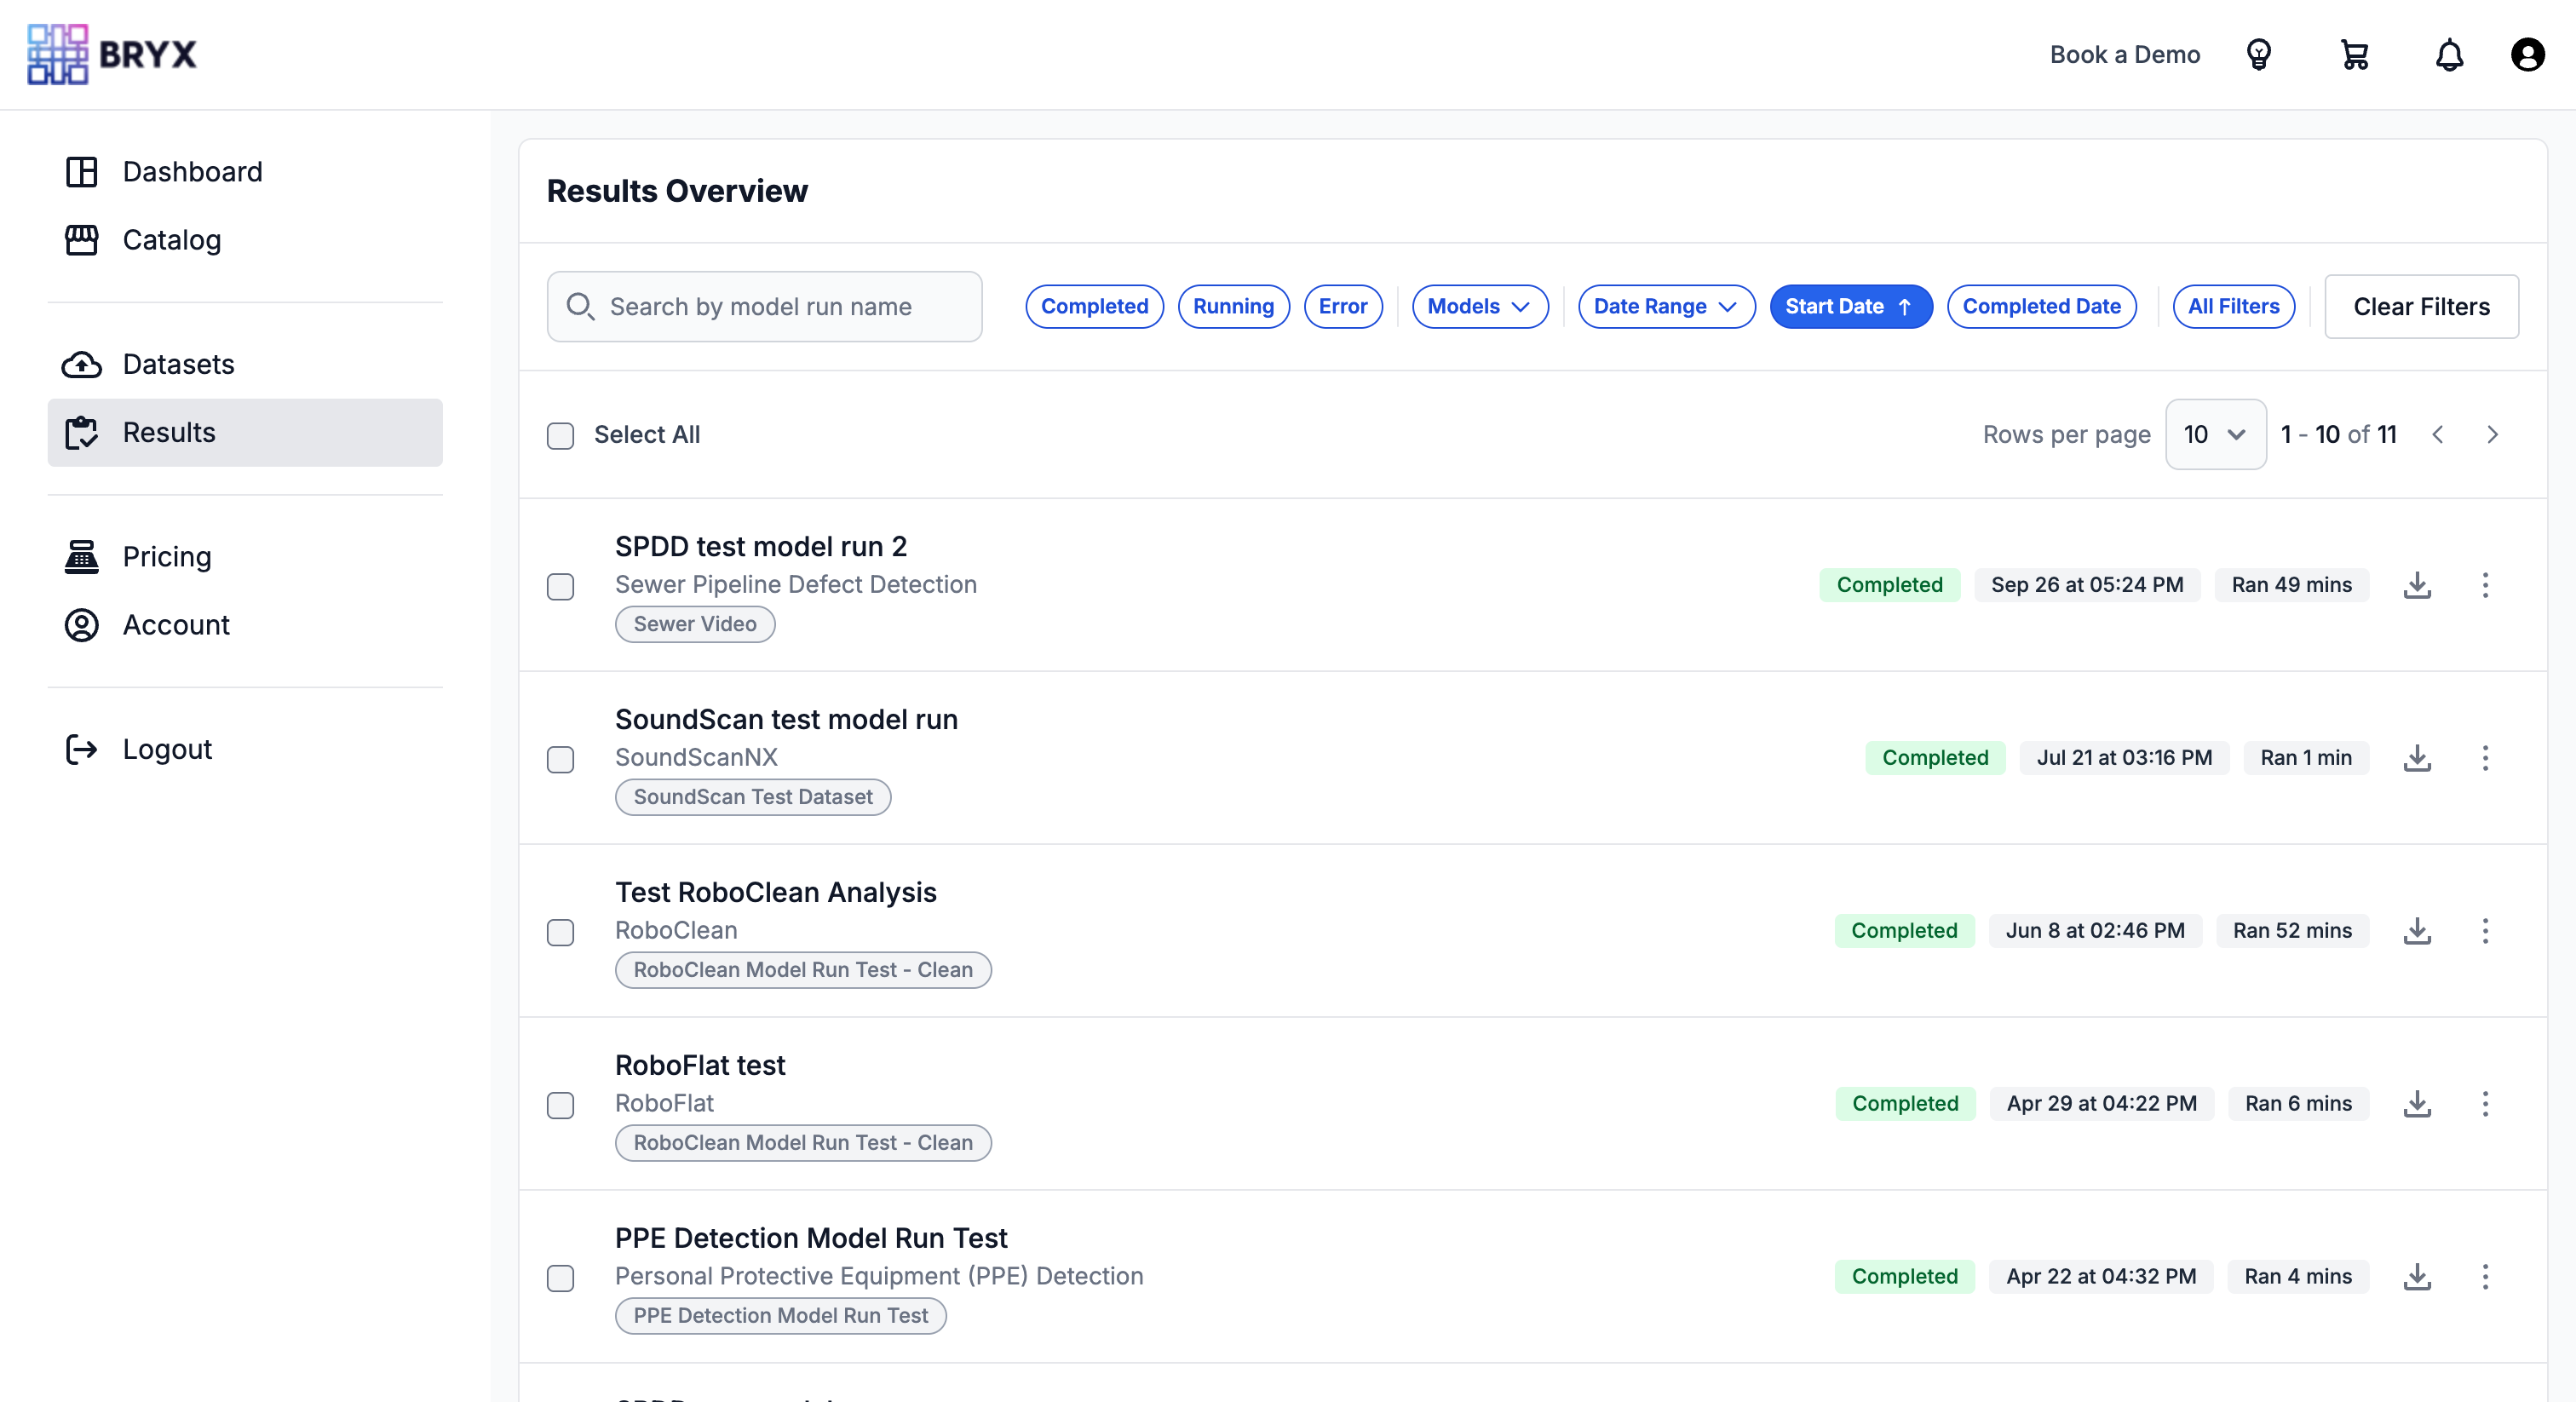
- On the Results Overview page, you can view a list of
your model runs. This list includes the following
information:
- The name of the model run.
- The name of the model associated with that run.
- The name of the dataset that the model was run on.
- The status of the model run (Running, Completed, Canceled, Error).
- The date/time that the model was started and completed.
- Use the filter options at the top of the page to narrow
the list, if necessary. To filter results, you can:
- Enter text to filter on a model(s) name in the MODEL RUN NAME field.
- Choose one or more models from the MODEL drop-down list to only view results of specific models.
- Choose one or more models from the STATUS drop-down list to only view models with a specific status.
- Select the model run that you are interested in viewing.

View Results Details
From the Results Overview page, select on a specific model run to view more information about the model run, including runtime messages, specified parameters, and output files that were generated.
RoboFlat Results
The RoboFlat solution provides detailed reports for floor flatness/levelness testing of concrete floors, listing pass/fail testing status, as well as precise information on issues found and how to remediate them. RoboFlat outputs a DXF file, which can be imported into CAD software, as well as a PDF report for stakeholders and an XLSX file that includes interactive charts. In addition, heat maps and cut/fill values are provided as part of the solution.
The Results Details page for RoboFlat lists the input file(s) that were run.

- Click on the input file to view the output files that were generated.
- Download the files that you are interested in, or select the Download Report button to download all output files in zip format.
Computer Vision Results
BRYX computer vision models output the following files:
- Annotated images: Output images are annotated with a bounding box and label that displays the object name and precision/recall metric for the individual detection.
- XLSX file that lists the detections found, along with x, y coordinates of the detected object, and the confidence levels of each detection.
To view model results, do the following:
- Select the appropriate model run from the Results Overview page.
- On the Results Details page, the input file(s) that
were used in the model run appear. You can do the
following:
- Select a specific input file to view the results for that file.
- Use the filter options at the top of the page to narrow the list, if necessary. To filter results, you can:
- Choose one or more objects from the OBJECTS drop-down list to view results that include the specified object(s).
- Use the Quality / Quantity Trade-Off Measure level slider to filter the results that are displayed. Note that the model run's annotated images and report will still include any detections found using the settings you specified as parameters for the model run.
- Select the Download Output Images button to download all output images associated with the selected input image.
- View a summary of each object found with its associated confidence level.
- Select the Download Report button to access summary reports about the model run.
Note: To detect small objects in large images, automatic tiling is performed as a preprocessing step. For example, the output of one large input image would be multiple, smaller images in order to more accurately detect the objects within the image.